Why rosy soft glam works better than heavy date-night makeup
Keep the skin fresh and put the romance in the color. That is the best rule I have learned for a Valentine’s Day makeup look. A rosy soft-glam face should look polished in person, flattering in restaurant lighting, and still believable when someone is sitting close to you. Thick foundation, harsh contour, and black smoky eyes usually fight that goal.
Rosy color creates warmth without looking costume-like
Pink, mauve, rose, and soft berry shades echo the natural changes in the face: flushed cheeks, darker lips, and the shadow around the eyes. That is why the look feels romantic instead of theatrical. The trick is to repeat one color family in small amounts. Use a muted rose on the lid, a similar blush on the cheeks, and a pink-brown or berry-nude lip. The shades do not need to match exactly. They need to share the same temperature.
Rose colors also photograph well because they add life without creating a flat orange cast. A cool mauve works beautifully with pink or blue undertones. Peachy rose suits golden or olive skin. Neutral skin can move between both, but dusty rose is usually safer than a very bright bubblegum pink.
The real goal is balance, not maximum coverage
Soft glam exists to solve a simple problem: you want more definition than everyday makeup, but you do not want the makeup to become the first thing people see. Even coverage belongs only where you need it. Let freckles, natural texture, and a little skin shine remain visible. Add definition around the eyes and cheeks, then stop before every feature has the same intensity.
My verdict is clear: for a romantic date, rosy soft glam beats a full matte face because it gives the structure of evening makeup with the movement and warmth of real skin.
How to build the base so the skin still looks like skin
A rosy eye look cannot rescue a base that is too thick, too dry, or badly matched. The base should even out redness while leaving the natural shape of the face visible. This takes less product than most people expect.
- Prep for five minutes. Apply moisturizer to clean skin and give it three minutes to settle. If your cheeks feel tight, press a small amount of cream into them instead of adding a heavy layer everywhere.
- Use thin coverage in the center of the face. Start around the nose, inner cheeks, and chin. Blend outward with a damp sponge or a lightly packed brush. Stop when the redness looks softer, not when every pore disappears.
- Spot-conceal instead of adding a second foundation layer. A small brush gives more control under the eyes and around blemishes. Leave the outer cheeks lighter so blush can melt into the skin.
- Set only the areas that crease. Press a small amount of powder under the eyes, beside the nose, and through the center of the forehead. Do not powder the entire cheek if you want a soft, healthy finish.
- Place blush higher than you think. Smile naturally, relax the face, and apply color on the upper cheekbone, blending toward the temple. Low blush can pull the face downward in photos.
- Add glow with placement, not glitter. Tap a subtle sheen on the top of the cheekbone and the inner corner of the eye. Skip the tip of the nose if you already have visible texture there.
Why cream layers usually look more natural
Cream blush and cream bronzer keep the surface flexible, so the makeup moves when you smile. Powder still helps with longevity, but too much powder over cream can make the cheek look dry and separate from the rest of the face. If you prefer powder blush, use a light layer over a lightly set base rather than pressing it onto wet foundation.
When to skip the dewy finish
Do not force glow onto oily areas or textured skin just because the occasion feels romantic. A satin finish is often more flattering than a wet finish. If your makeup tends to slide, keep the forehead and nose softly powdered and place luminosity only on the cheekbones. The best Valentine’s Day base is the one that still looks intentional after four hours, not the one that looks shiny for the first twenty minutes.
Build the eyes and cheeks around one clear focal point
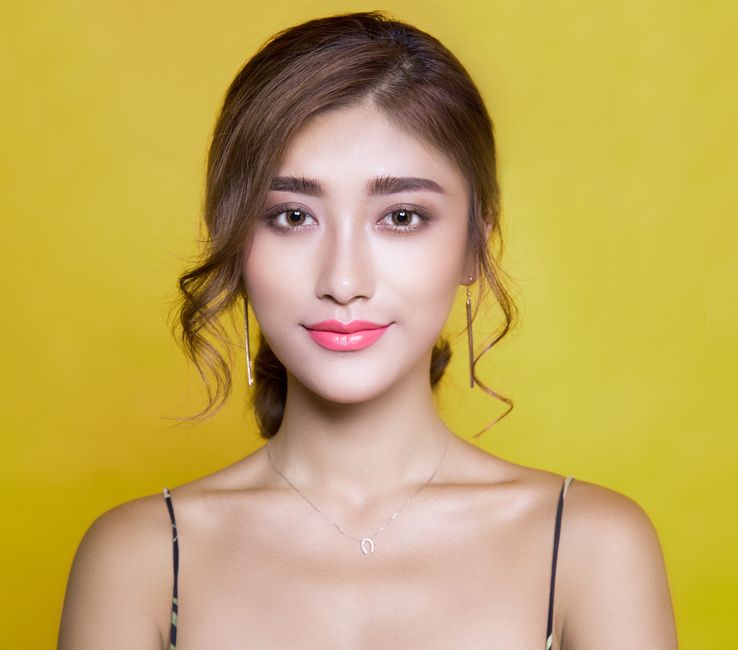
My strongest recommendation: make the eyes softly defined, then let the cheeks carry the romantic flush. The Anastasia Beverly Hills Soft Glam Eyeshadow Palette is a practical reference for this color story because its 14 shades include matte neutrals, rose pink, dusty rose, and deeper brown tones; its listed price is about $48 in the United States. You do not need that exact palette, but you do need the same range of light, medium, and deep shades.
A simple rosy eye sequence that does not turn muddy
Start with a matte beige or light rose across the lid. Add a medium dusty rose just above the crease, keeping the color slightly higher with the eyes open. Press shimmer only onto the center of the lid, then use a small brush to place a deeper brown or plum at the outer corner. Blend the edges, but do not keep sweeping until all contrast disappears. Finish with a soft brown pencil along the upper lash line and mascara concentrated at the roots.
The failure point is usually too much red in the crease. Red and pink can make tired eyes look irritated when they sit too close to the lower lash line. Keep the lower lash line mostly brown, mauve, or bare, and place the brighter rose on the upper lid instead.
Use blush as the bridge between eyes and lips
Rare Beauty Soft Pinch Liquid Blush in Hope costs about $25 and has a dewy nude-mauve finish with strong pigment; one small dot is enough for both cheeks. It is a good example of the right texture for this look, but its intensity makes overapplication easy. Tap the product onto the back of your hand first, then use a brush or fingers to press it onto the cheek. A muted mauve blush is my clear pick when the eye has shimmer because it adds romance without creating another bright spot.
Keep highlighter separate from blush. Blending them together across the whole cheek can turn a soft flush into a shiny pink patch. Leave the apple of the cheek mostly satin and reserve the glow for the highest point.
Which lip finish fits a romantic date?
Should the lip be pink, mauve, or berry?
Choose a pink-brown or muted rose when the eyes have a visible shimmer. Choose mauve when the blush is peachy or warm. Choose berry when the rest of the face is quiet and you want the lips to lead. The strongest option for most people is a rose shade one or two steps deeper than the natural lip color. It gives shape without requiring a sharp, high-maintenance outline.
Is gloss better than matte lipstick?
Gloss looks softer and more youthful, but it moves faster during dinner and can catch hair. Fenty Beauty Gloss Bomb Universal Lip Luminizer costs about $23 and gives a smooth, high-shine finish with a sheer wash of color. It is the better choice for a relaxed date or a look built around fresh skin. A matte lipstick lasts longer, but a dry formula can make the whole face look harder than intended.
How should the lip be applied?
Blur the natural edge with a fingertip, add liner only at the corners and center of the lower lip, then press lipstick into the middle. Add gloss to the center rather than dragging a thick layer over the outline. Charlotte Tilbury Matte Revolution Lipstick in Pillow Talk remains a useful pink-nude reference because its muted rose tone works with many soft-glam looks, but do not buy it if pale nude lipstick makes your lips look grey. A deeper rose liner underneath is the better adjustment.
My verdict: choose gloss for softness, satin lipstick for balance, and matte only when longevity matters more than a plush finish.